3500kg Bilstein GVM Upgrade Kit to suit Toyota Hilux GGN / GUN (2015-on)
Purpose-built to increase the Gross Vehicle Mass to 3500kg, this Bilstein GVM Upgrade Kit has been engineered specifically for the Toyota Hilux GGN and GUN platforms (2015-on). Developed to meet Australian compliance standards and real-world operating conditions, this solution enhances load carrying capability while maintaining ride control, durability and full regulatory alignment.
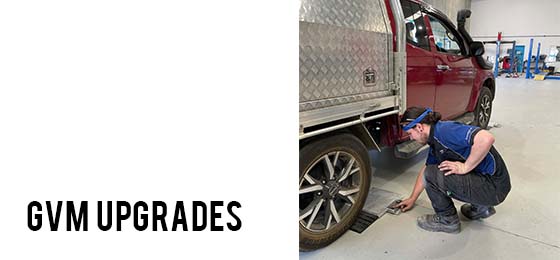
Engineered Compliance & Installation Framework
GVM upgrades require formal engineering approval, certification and mod plating in accordance with state legislation. Accordingly, this upgrade can only be installed at an Authorised and Approved Fulcrum Suspension Workshop.
Through our Click & Fit service, you can purchase this GVM kit online and nominate a preferred authorised installer. Following your order, a Fulcrum suspension specialist will contact you to validate vehicle specifications, intended load profile and application requirements to ensure correct configuration and compliance outcomes.
GVM kits are shipped directly to certified dealers and must be installed by an authorised Fulcrum workshop.
- Pre-registration vehicles: Engineering and certification included at no additional cost.
- Post-registration vehicles: Additional charges apply due to modification of existing registration records and issuance of a new mod plate. These costs are displayed during the online purchase process when selecting pre- or post-rego status.
Once installed, your Hilux will be engineered, certified and compliant for state registration.
Suspension Performance & Capability
This GVM upgrade delivers a 40–50mm lift on loaded vehicles, with additional ride height when unladen.
Revised Weight Ratings:
- GVM Increase: Upgraded to 3500kg
- No GCM increase
This kit is 100% legal, engineered, road tested, approved and certified.
It is ideally suited to:
- Mining and fleet operations
- Agricultural applications
- Trade and service vehicles
- Touring builds
- Off-road and recreational users requiring compliant payload capacity
Vehicle manufacturer warranty is not affected when a compliant GVM upgrade is fitted.
All components are tested, assembled and built in Australia.
Bilstein B6 Shock Absorber Technology
At the core of this GVM solution are Bilstein B6 Heavy Duty monotube shock absorbers, engineered to deliver superior damping control under increased axle loads and demanding terrain.
Key B6 features include:
- Monotube high-pressure gas design for consistent damping performance
- Low-pressure nitrogen charge to reduce aeration and deliver fade-free operation
- Large piston / big bore construction for improved heat dissipation
- Application-specific valving matched to Hilux load characteristics
- Enhanced vehicle stability, steering precision and braking control
- Proven durability in heavy-duty and remote-area conditions
The B6 platform provides disciplined body control while retaining ride compliance, ensuring predictable performance whether operating fully laden or unladen.
Additional Inclusions
- Aftermarket Upper Control Arm Kit included as standard to correct suspension geometry and maintain proper alignment at lifted ride height.
- Specifically tuned for the Toyota Hilux GGN / GUN chassis architecture.
- Tested, fitted and locally supported.
Bilstein GVM Kit Warranty:
3 Year Warranty – Activation required online.
High-Level Product Highlights:
- GVM upgrade to 3500kg
- No GCM increase
- Bilstein B6 Big Bore monotube shock absorbers
- Low-pressure nitrogen for fade-free performance
- Designed and validated for Australian conditions
- Application-specific engineering
- Unlimited kilometre warranty (activation required)
- Fully engineered and state compliant upon installation
For operators requiring a compliant uplift in payload capacity while maintaining stability, durability and long-term reliability, this Bilstein B6-based GVM upgrade delivers a professionally engineered outcome aligned to both operational and legislative requirements.
Lift Kit Height & Variation Overview
Understanding Lift Height Tolerances
Within the suspension industry, advertised lift heights are typically presented as a nominal increase. At Fulcrum Suspensions, we believe it is important to clearly outline how those figures are determined and why final results may vary.
The lift height referenced in a product title reflects the average increase achieved during testing and fitment across a broad range of vehicles. However, due to the inherent complexity of suspension systems and the unique condition of each vehicle, final lift outcomes will always fall within a tolerance range.
Factors influencing final ride height include:
- Factory ride height tolerances
- Vehicle age and prior suspension sag
- Accessory fitment (bull bars, winches, drawers, canopies, etc.)
- Engine variant (petrol vs diesel)
- Existing spring fatigue from long-term load
- Pre-existing suspension modifications
When accurate constant load information is provided and the correct spring rates are supplied, the vehicle will achieve the intended lift height within acceptable engineering tolerance. External variables can result in a variation of up to approximately ±15mm from the advertised figure.
If a vehicle has pre-existing sag due to age or prolonged overloading, the measured increase may appear greater than advertised, as the new suspension restores the vehicle to OE ride height before adding the engineered lift increase.
Additionally, all vehicles leave the factory with minor ride height variations. As a result, before-and-after measurements will differ slightly between vehicles, even when identical lift kits are installed.
Providing accurate vehicle and load details is critical. Incorrect information may result in incorrect spring selection, which directly impacts final ride height and vehicle stance.
Springs, Load Ratings & Correct Setup
Springs are the primary component responsible for lifting your 4WD. Selecting the correct spring rate is essential to achieving the intended height increase and maintaining proper vehicle balance.
Following your purchase, our suspension specialists will contact you to confirm vehicle specifications, accessory fitment and constant load details before processing the order. This ensures the most appropriate configuration is supplied for your application.
Constant Load Considerations
A “constant load” refers to weight permanently carried in the vehicle or fitted 24/7. Examples include:
- Bull bars and winches
- Dual battery systems
- Canopies and drawer systems
- Long-range fuel tanks
- Rear bars and spare wheel carriers
Spring rates must be matched to this ongoing weight. For example, if a vehicle consistently carries approximately 250kg, the selected spring should align with that load profile.
Both front and rear springs operate as a system. If either end is mismatched to the vehicle’s load, it can result in uneven ride height (nose-up or nose-down stance), which compromises performance and appearance.
Under-Rated vs Over-Rated Springs
Under-rated springs:
If the spring rating is lower than the constant load carried, premature sagging or failure may occur. Overloading can result from excessive tray weight, heavy accessory fitment or tow ball download from caravans, boats or trailers.
Example: Installing a 300kg-rated rear spring while consistently carrying 500kg will result in spring fatigue and loss of ride height.
Over-rated springs:
Selecting a spring rated significantly higher than your constant load can create an excessively firm ride. This may lead to reduced comfort and potential suspension issues such as shock top-out or coil seating problems.
Correct spring selection ensures ride comfort, durability and balanced vehicle dynamics.
Dynamic Loads & Airbag Assistance
If your vehicle occasionally carries additional load beyond its constant setup — such as towing a caravan or carrying weekend gear — supplementary airbag assistance may be required.
Airbag kits are not designed to replace springs or permanently carry weight. Instead, they provide additional support to manage intermittent load increases and maintain ride height under temporary demand.
Recommended Approach
For optimal results, we recommend finalising all constant load accessories prior to lift kit installation. This ensures accurate spring selection from the outset and avoids the need for future adjustments.
Our team will guide you through the process after purchase to confirm all relevant details. If you have questions prior to ordering, our technical advisors are available via phone or online chat to assist.
By ensuring accurate load data and proper configuration, your lift kit will deliver balanced ride height, predictable handling and long-term durability aligned with your vehicle’s intended use.
*All prices shown on the website include GST. You will not be charged any additional fees related to tax. For international orders, GST is removed, local import duties or taxes may apply but will not be charged by us.
Product Stock
Please be advised that our stores do not hold any stock. In order to make sure things go as fast as possible you can purchase your parts online. If you would like to have your parts installed by us please choose Click & Fit at the checkout.
You can use the shipping calculator to find your shipping costs, your closest pick up or install locations. The shipping calculator will also show all shipping and installation prices. Shipping is free if you choose to get your item installed by us.
When our product stock levels are low, or current stock is allocated to orders, our website may show an ‘in-stock’ status when in fact the item might be sold out. We will advise within 48hrs; stock availability, order status and shipping details.
Delivery Methods
1. Select “Click & Fit” as a delivery method during the checkout process and you will be given a special fitted price to have both the product delivered and installed. A suspension expert will be assigned to your order, who will organise everything for you and will help you every step of the way. You can sit back and relax, knowing that your car is going to be looked after by suspension experts.
2. Select “Free Pickup” as a delivery method during the checkout process and you will be given free delivery to your nearest Fulcrum outlet where you can collect the parts. We will text and email you all your tracking details.
3. Select “Deliver to Door” as a delivery method during the checkout process and we will deliver your order direct to your nominated delivery address. We will text and email you all your tracking details.
We offer FREE shipping to all metro areas (excluding WA, TAS and NT).
If you live on the Australian coast, that does not mean you are subject to free shipping.
Express shipping times and free shipping times are only to be counted once the order has been shipped from our warehouses. Our free shipping and express shipping services both have the same order processing times. We first have to raise the order, then we send it to one of our warehouses for processing and once ready it will be shipped from the warehouse. The difference between express and free shipping services, is the time it takes for the item to be transported from our warehouse to your address.
Our free shipping policy is determined by densely populated metro locations and the viability of distance travelled from our distribution centres. We are constantly expanding our warehousing, so areas covered by free shipping are subject to change. See our shipping policy here.
We guarantee the fitment and quality of our products, but if you choose to return an item we offer a generous 60 day returns policy. See our returns policy here.
All products sold by Fulcrum Suspensions are covered by a national warranty. This products warranty is subject to conditions from the date of purchase, unless otherwise stated on the item.
Warranty claims must meet certain criteria and be sent to Fulcrum Suspensions with a receipt to be eligible for a refund. See full warranty claim criteria here.
Click & Fit Guideline
Select “Click & Fit” as a delivery method during the checkout process and you will be given a special fitted price to have both the product delivered and installed. A suspension expert will be assigned to your order, who will organise everything and will help you every step of the way. You can sit back and relax, knowing that your car is going to be looked after by suspension experts.
Your assigned suspension expert will confirm all the details for your booking. Your parts will then be delivered to your closest Fulcrum workshop and an installation date will be booked based on your preference. You then bring your car on the booking date and the Fulcrum workshop will install your order.
Installation includes full product installation by a qualified technician, a full wheel alignment, a complete suspension check, a visual brake inspection, and a complete report. We also offer a complimentary 1000km check-up service, which includes a suspension check and any retention work, your alignment and tyre wear will also be checked. If we find that anything needs to be amended during our 1000km check, we will carry out this work free of charge. This includes a wheel alignment, if required. Please note that Fulcrum Dealers are independant workshops and may not supply a full suspension report or offer a 1000km checkup. Workshops that are owned by Fulcrum Suspensions will do this for you though.
Throughout your order, installation, and service. You will be kept up to date every step of the way. Fulcrum offers this service to ensure you get the best possible experience.